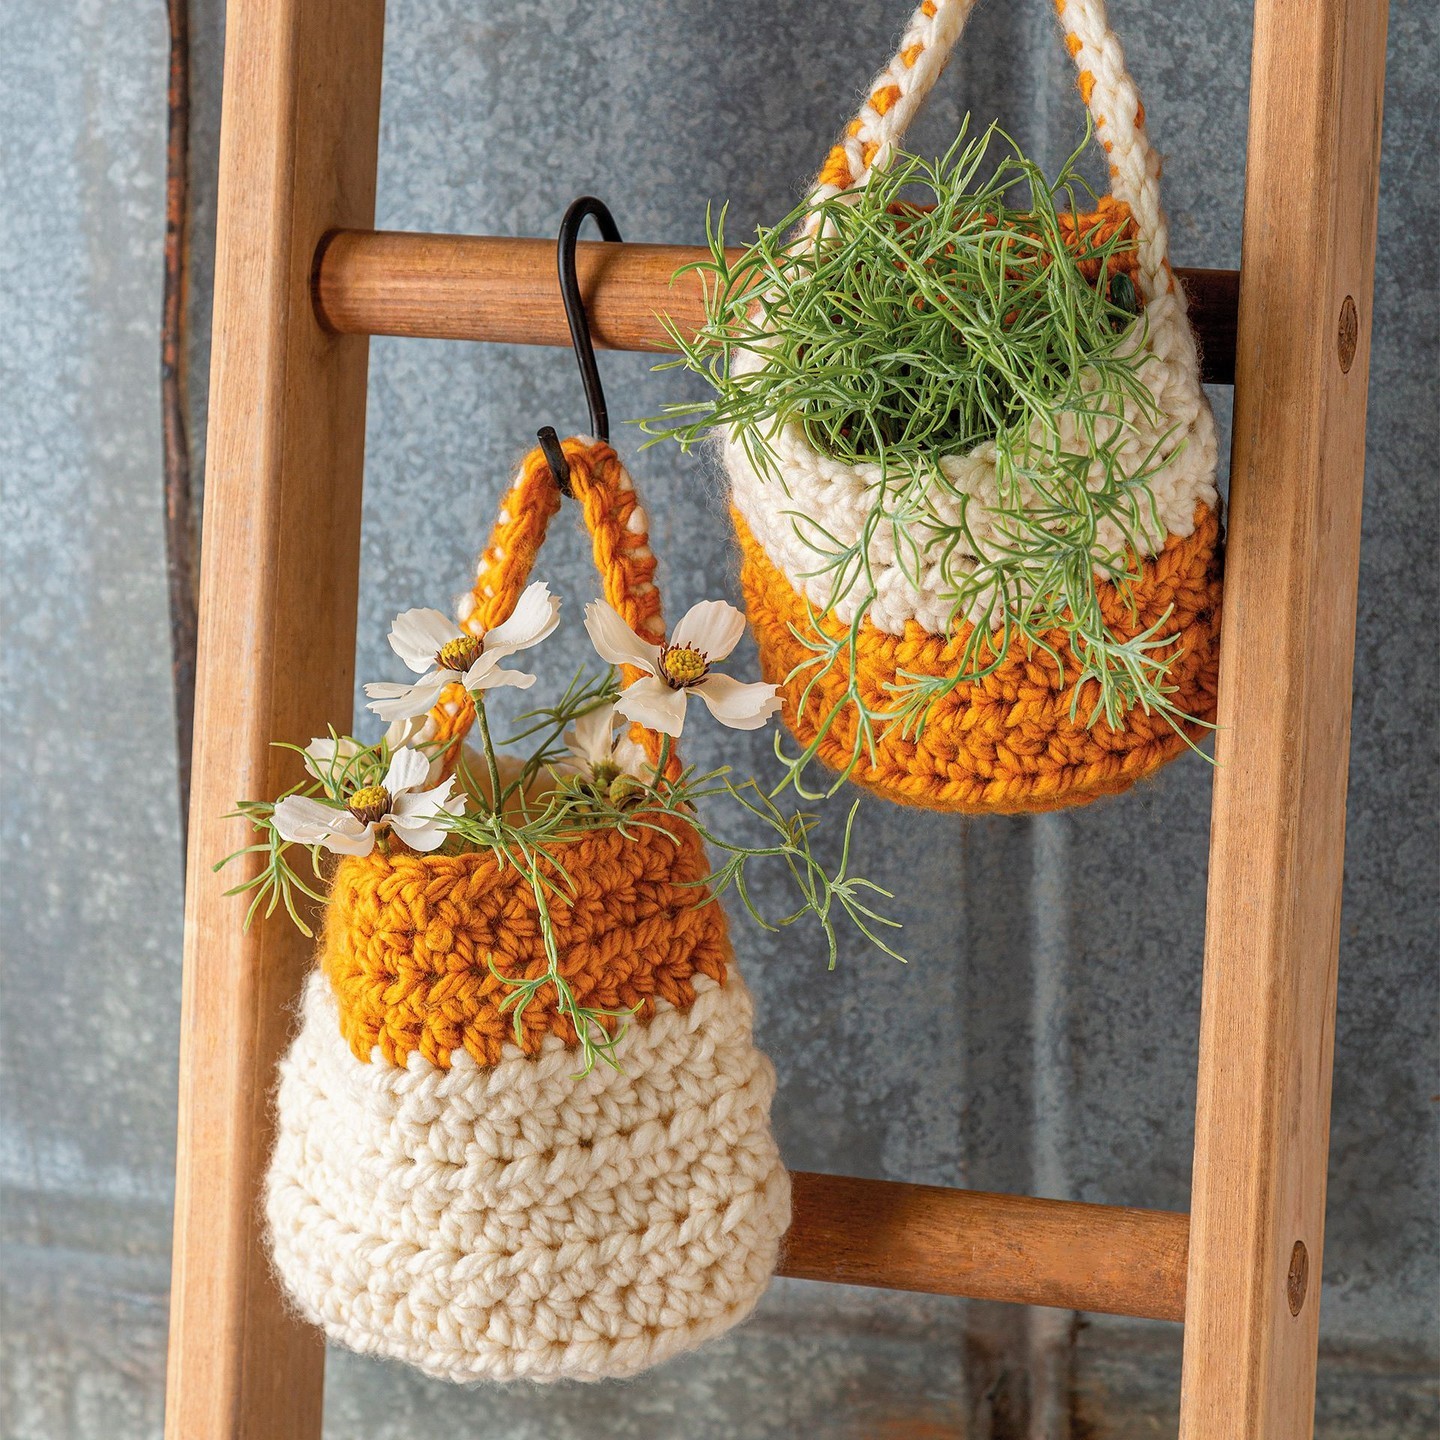
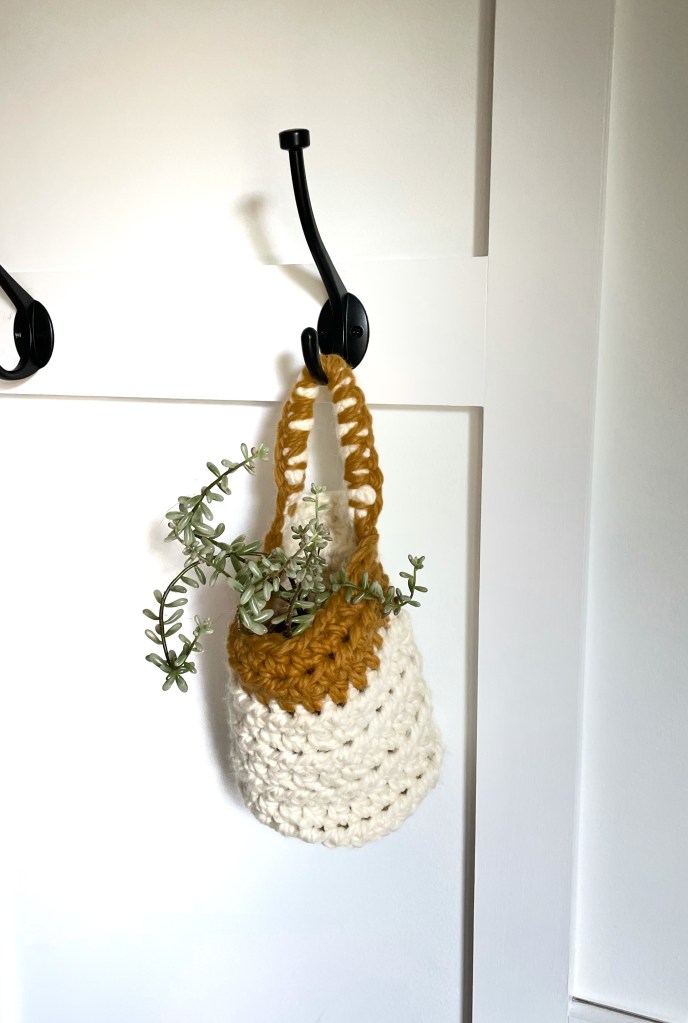
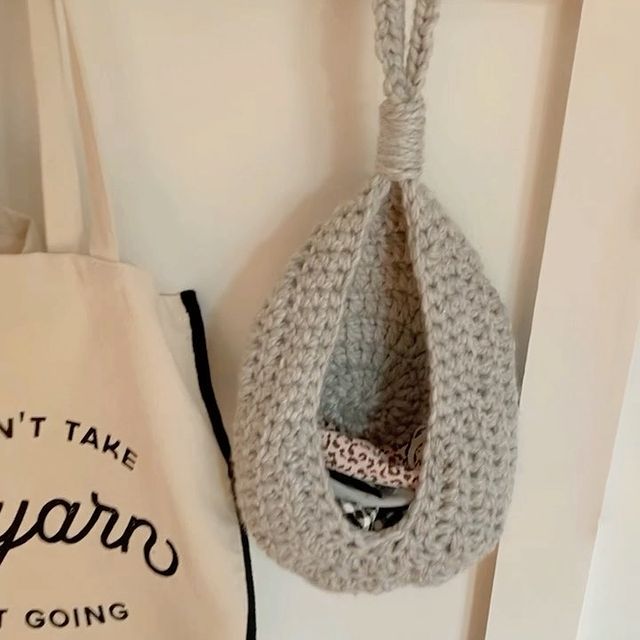
With its prominent texture and use of earthy colors, this hanging basket gives modern boho vibes. The neutral off-white yarn paired with the warm mustard lend to the creative and carefree bohemian aesthetic. The wrapped embellishment around the strap creates an eclectic feel and the chunky, cozy yarn brings it to life.
A unique feature I added for this basket is its functional flat back, which makes it ideal for resting against a wall, door, or other surface. Having a sturdy backside allows the basket to display its contents prominently. It also features a semi-circle bottom to prevent sagging or stretching as it holds items upright.
For this issue of Crochet World, I did an interview with Annie’s social media team. They asked great questions, some of which may be helpful to those following my pattern. I’m sharing an excerpt here.
What inspired you to create the design?
I have a space in my house with a bench and hooks that becomes a catch-all. Things get piled on the bench, which drives me crazy. This spurred the idea to make a basket to help with organization with features unlike other hanging basket patterns I’d seen.
Are there any special tips or tricks that our readers might like to know as they crochet your pattern?
When single crocheting around the handle to create the strap feature, work the single crochet stitches about 1/4″ apart and not too tight.
What advice would you give to someone that is learning to crochet?
Don’t give up! I teach crochet classes and hear people say learning feels unnatural. And it does…until it doesn’t. With practice and repetition, there comes a moment where things click and you find your rhythm.
Is there anything else you’d like to share with our readers?
To use the Modern Hanging Basket to hold a plant, put the plant and soil (or plant cutting and water) in an upcycled container like a used, washed 32 ounce yogurt container.
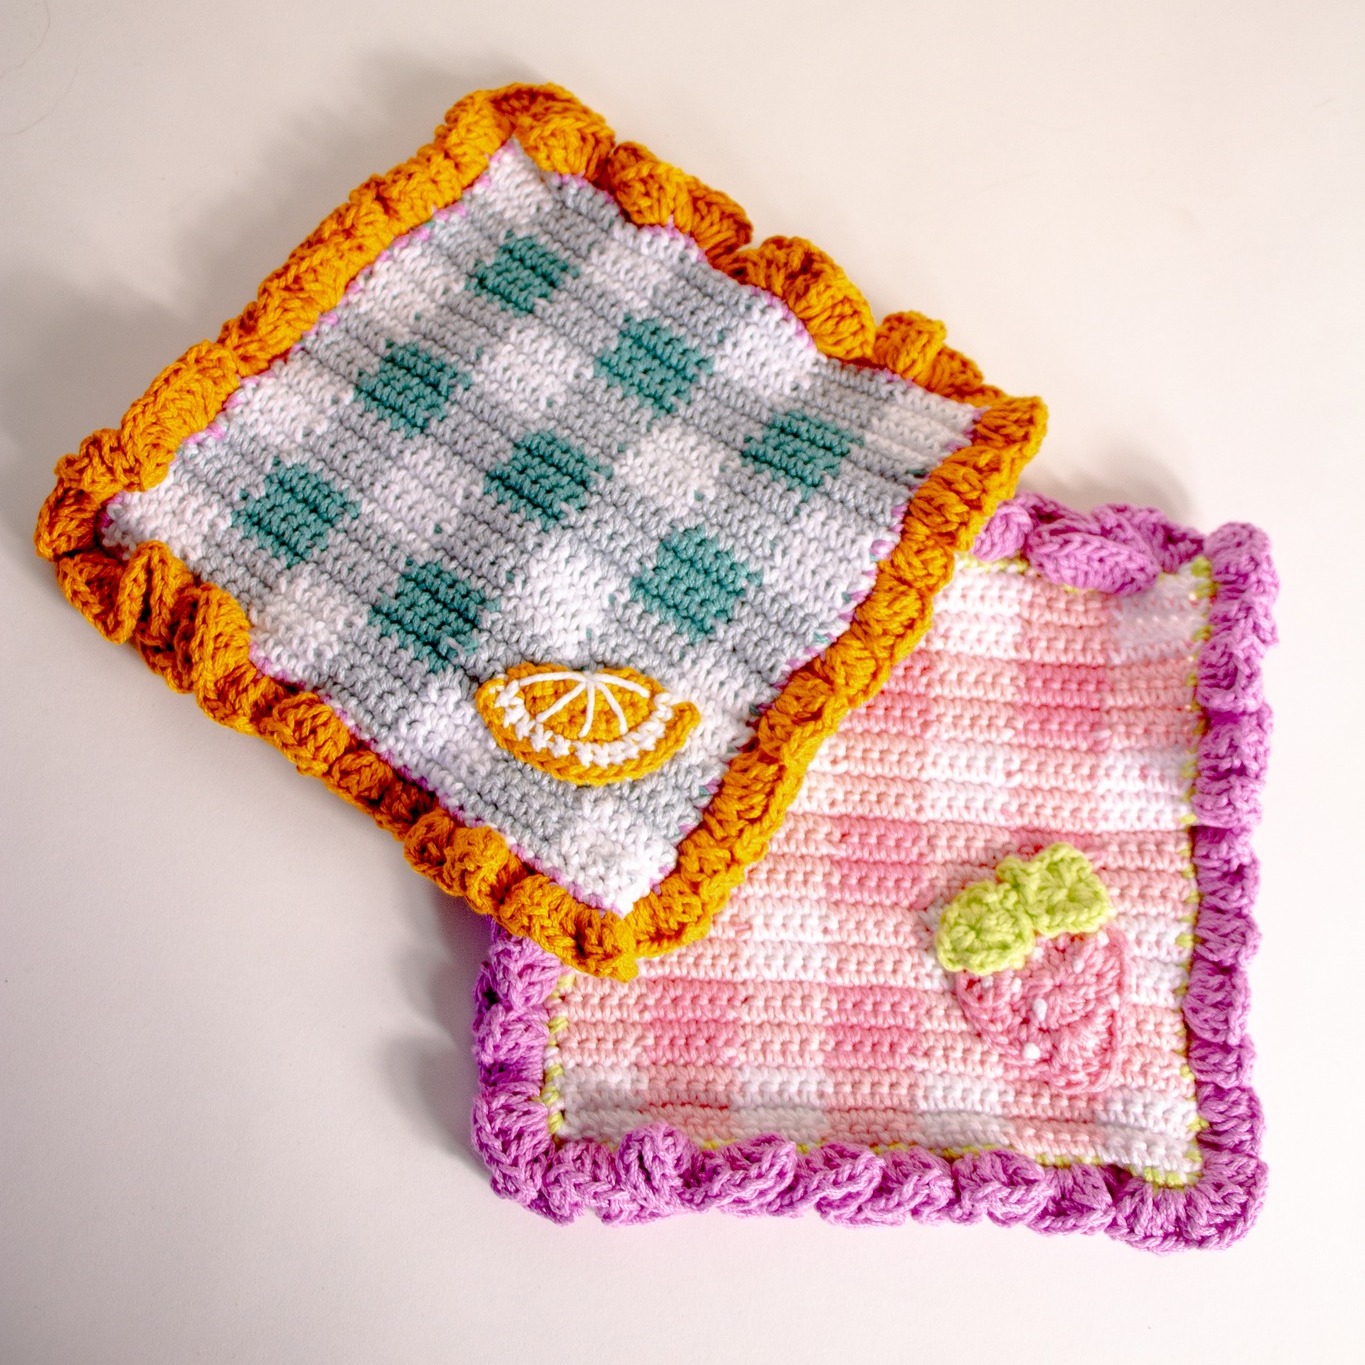
Do they look like little picnic blankets to you? I created these crochet dishcloths for the April issue of I Like Crochet using a technique that mimics gingham, the classic picnic blanket pattern. I added flat fruit appliques and sewed them on, furthering the idea of a spring lunch al fresco.
To create the gingham effect, you carry all 3 strands of yarn as you work, crocheting over the colors not in use. Here’s a quick, close-up video that shows how it’s done. This minimizes the number of yarn ends that would need to be woven in at the end, which would be an insane amount if you tied off every time you switched colors.
“These charming creations bring the freshness of a picnic indoors with their gingham design and fruity flair.”
– I Like Crochet
It’s difficult to see in the photo above, but clearer in the photo below, that I added a pop of color via a single crochet border around the gingham square. Onto that, I crocheted a ruffle border for a touch of whimsy and fun. These are not your grandma’s dishcloths!
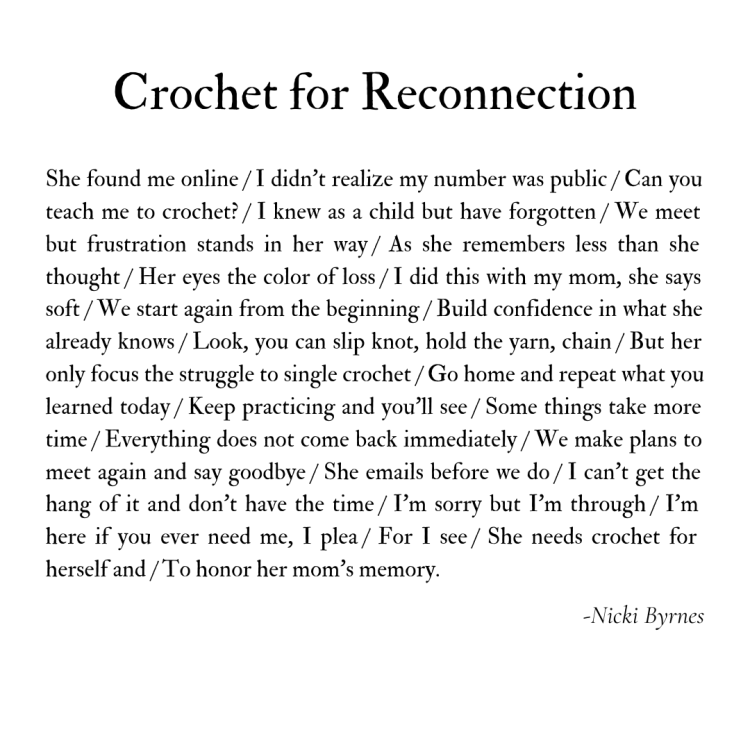
Note: A few years ago, I got a glimpse of what life would look like without my mom. I didn’t like it. In 2008, I saw my cousins lose their mom and navigate insurmountable grief. I didn’t like it. And a few years ago, what started out as a casual crochet lesson turned into a reminder that grief does not go away for so many who have lost their mom. It rears its ugly head at unexpected times. Here’s a poem about what I call “The 4 P’s of Crochet” (like the 4 P’s of Marketing), with her story, and that of so many, woven in. I’m sharing today, Mother’s Day, for anyone struggling with grief and loss.
She found me online
I didn’t realize my number was public
Can you teach me to crochet?
I knew as a child but have forgotten
We meet at the library
She remembers less than she thought
Melancholy replaces expectancy
Her eyes full of sorrow and loss
I did this with my mom, she says soft
She’s frustrated
Quick to huff and sigh
Hang in there, I say
Keep going – Patience
It comes quickly to some
Others, it takes more time
But anyone can master it
With tolerance and grit
We try something different, a new method
Thicker yarn with larger loops can be easier to work in
Bigger hook immune to beginner’s tension
But much to my chagrin
She’s frustrated
Quick to huff and sigh
Hang in there, I say
Keep going – Persevere
We start again from the beginning
Build confidence in what she already knows
Look, you can slip knot, hold yarn, chain
But her only focus the struggle to single crochet
She’s frustrated
Quick to huff and sigh
Hang in there, I say
Keep going – Practice
Go home and repeat what you learned today
Keep working on single crochet and see
Some things take more time
Everything does not comes back immediately
Everything worthwhile does require hard work
So don’t be so hard on yourself
But the vigor she once had has left
Eyes look distracted and shoulders now slumped
We make plans to meet again and say goodbye
But she emails before we do
I can’t get the hang of it and don’t have the time
Looking to design your own sweater but unsure where to start? I’m here to guide you through each step so you can bring your crochet dreams to life with confidence.
I understand how difficult it is to go from an idea for a crochet piece to actually creating it. Finding clear, easy-to-follow instructions is hard to navigate. You can read about my experience here. But once you figure it out, the sky is the limit. You can see one of my favorite sweaters I designed here.
Now, I’m sharing my process with you so you can feel inspired to design and crochet your own tops.
Here are the steps to designing a crochet top:
Key Steps
1: Sketch your crochet top: Start with your idea or vision and sketch it onto a piece of paper or digitally.
2: Decide how your top will be constructed: Choose the way your pieces will fit together to create the top.
3: Draw your individual pieces: Draw each piece you will need to crochet.
4:Determine your size: Gather measurements from the Craft Yarn Council.
5:Make your gauge swatch: Crochet a square to see how big your stitches and rows will be.
6: Calculate stitches and rows: Use your measurements to figure out the right number of stitches and rows needed for each piece.
Once you’ve completed step 6, you will have all the information you need to crochet your individual pieces and then assemble them by seaming or sewing them together. For a smoother, more refined finish, some crocheters choose to block their garments, which helps them feel softer and drape better. I don’t always block my crochet items, but when I do, I use a simple process which I explain in this post.
Please Note: This guide outlines the basic, foundational steps I used to design my first crochet sweater. While there are other methods, this simple process will give you a solid understanding of design and construction.
Step 1: Design your crochet top
It doesn’t matter how well you draw. Put your idea down so you have its shape and design. Jot down what type of stitches you will use. Here’s a great book that lists a ton of stitch options and gives important info you may use later as you get further down your crochet design journey.
I recommend starting out simple, like all half double crochet, so you can put your energy towards understanding the process.
Drop shoulder sweater sketch
Step 2: Decide how your top will be constructed
Based on your sketch, figure out which construction type will work best for your sweater shape. Here is an article that is helpful: 6 common ways to construct a crochet sweater.
For simplicity’s sake, I am using a drop shoulder sweater as our example because it only requires two rectangles (for the front and back body panels) and triangle-ish shapes for the sleeves.
Step 3: Draw your individual pieces
Under your sketch, draw the components or pieces that will make up your sweater. For example, the sleeves, body panels, and any waistbands, cuffs, or collars.
Sweater components
Step 4: Determine your size
In order for a garment to fit properly, it is critical to follow industry standard sizes. Fortunately, the Craft Yarn Council has a body measurement chart where you can get measurements needed for Baby, Child/Youth, Woman, Man, Head, Foot, and Hands.
If you want to make a women’s size Small, for example, you will look at the Standard Body Measurements/Sizing to see which body parts you need measurements for, and then the Women’s Size Charts to write down the dimensions they list.
Gather the measurements you need for each of the pieces you drew in Step 3 and write them down next to your sketches. This tells you how big each piece needs to be (how long the sleeves need to be, for example, or how wide the body panel should be to fit a standard Women’s Small).
Notice many of the CYC measurements are circumferences, so divide them into two if you are creating just a front panel and then a separate second back panel that you’ll sew together to make the full body part. Once seamed together during the final assembly stage, their circumference should match the circumference listed by the CYC.
Step 5: Make your gauge swatch
In Step 1, you identified what stitch(es) you want to use for your top. You now need to create a gauge swatch, or a 6″ or 8″ square, using the exact yarn, stitch, and hook you will crochet your sweater in. If you are using different stitches in the sleeve versus the body, you will need swatches for each different type of stitch. Again, I recommend starting simple. Just use one stitch for your first sweater.
Crochet your swatch and write down how many stitches are in 4″ across and how many rows are in 4″ up.
Here is an example. Let’s say we make a 6″ square gauge swatch and it shows there are 8 half double crochet stitches (hdc sts) in 4″ across and 7 hdc rows are 4” high.
You can write your gauge either as: 8 hdc sts by 7 rows = 4″ x 4″ square
Or as: 8 hdc sts= 4″ and 7 hdc rows = 4″
These numbers will be used in the next section when we figure out how many stitches and how many rows are needed to make each of the garment pieces in step 3.
Step 6: Calculate stitches and rows
Here comes the magical math. At this point, you know the dimensions of each of your pieces (Step 4) and your gauge swatch (Step 5), so you are ready to figure out how many stitches and how many rows are needed for each piece of your garment in Step 3.
This will tell you how many stitches you need to crochet across to get a body panel in the size you wrote down in Step 4, for example. It will tell you how many rows up you need to go in order for that body panel to be your desired height.
To find out how many stitches are needed, the formula is:
Write this equation down and fill in the pieces you know (Gauge stitches and Dimensions per the CYC).
Now, you solve for X (which is the “How many stitches are needed”).
I will give you an example. Using the gauge swatch example above, we know our top will be 8 stiches per 4″. So we will fill in “Gauge stitches” in the equation with 8. We also know the CYC says our panel should be 13″ wide. We will fill in “Dimensions per CYC” with 13. We cross multiply 8 x 13 = 104. The equation is now 104 = 4X (X being “How many stitches are needed”). Divide 104 by 4 and X = 26. You will need 26 stitches to make the body panel.
Remember, you have to start crochet with a foundation chain, so add however many stitches are needed for the foundation row’s turning chain. If you’re doing a single crochet, for example, you’ll only need to add 1. So your final stitch count to make the front body panel is 27.
To find out how many rows are needed, the formula is:
The same!
Follow the same process for number of rows so you know how tall your body panel needs to be. Using our gauge swatch example above (7 rows) and desired body measurements of 14″ tall, we fill in the equation and find:
7 x 14 = 98. The equation becomes 98 = 4(X rows needed). Solve for X, so 98/4 = 24.5. Since this isn’t a round number, you can go up or down a row based on how one more row or one less row will impact the sweater size. Many of the measurements on the CYC website are a range, so keep in mind what measurement you chose from their site as you decide whether to go up or down a row, and use your discretion.
If this makes sense, awesome!! If it doesn’t, read it again. No shame in it.
One note about measurements. Note I said 14″ earlier for the sweater length. That would be quite the crop top. A women’s small is recommended to be 17″, but if you’re adding a detail like a waistband, you have to adjust your dimensions. Make sure to note details like this in your Step 3 sketches and adjust your measurements in Step 4. You should sketch a waistband and note it will be 3″, for example, so your body panel only needs to be 14″ so that your sweater is 17″ when assembled.
Put it all together:
You can now make your front body panel with a foundation row of 27 stitches, and 26 stitches per row going forward. Work that for 24 or 25 rows. Repeat this same pattern for the back body panel.
This is the basic process to figure out the dimensions for a rectangle. The more involved your sweater or top construction, the more thinking and math you will need to do. Again, start simple and build on your learnings.
Sleeves
Sleeves can be done the same way as the body. Sketch what you want yours to look like, write down your measurements per the Craft Yarn Council standards, and use the formulas above to guide how many stitches and rows you need. This will give you rectangular sleeves. You fold them in half, seam them up, and attach them to the sweater where the armhole is. Attach them so the seam is underneath, just
An alternative way to make the sleeves is to crochet them onto the body panels. Once the body panels are completed, you assemble them by seaming the shoulders and then the sides, from the bottom up until you hit where the armhole starts (a measurement you get from the CYC). You would start by attaching your yarn on the wrong side of the piece, at the bottom of the armhole, and crochet around the armhole until you hit your desired length. Again, these would be straight and loose sleeves.
If you want sleeves that are more triangular or tailored in shape, meaning they get narrower towards the wrist, you will need to decrease your stitch count as you work your way down the sleeve. I talk more about sleeve options in this post. Like everything, sleeves can get more complicated, so save that link for when you design your second sweater 🙂
Crochet Sleeve Sketch
Assembly
At this point, all of your pieces are mostly complete. You may have cuffs, a waistband, or a collar to add, but I recommend assembling the body at this point. You can crochet the cuffs onto the sleeves as the last sleeve step if you’d like, but the waistband should wait until this step when the body panels are sewn together.
Shoulders
To sew the body panels together, start with the shoulders. Choose which side of the body will be the front and mark it with a stitch marker. Lay the two body panels on top of each other with right sides facing each other. I like to use stitch markers to mark the neckhole. The circumference around the neck should be about 16 to 20 inches (40 to 50 cm) for an adult size. You can adjust based on the specific fit and size of the sweater, of course, but for our drop shoulder example, let’s use 20″ for the neckhole.
Since that is circumference and our body panels are laying flat on top of each other, we want to mark a space 10″ wide in the center of the top of our body panels. Mark the space with stitch markers, then count your stitches left and right and try to adjust your markers so you have an even number on each side from the stich markers to the shoulders.
OR, for a more precise route, we can use our measurements from previous steps and calculate how many stitches should comprise the shoulders and how many will be skipped for the neckhole. Let’s do the math.
Our example sweater body panel was 26 stitches across. Our gauge said 4″ = 8 stitches. That means our front body panel’s neckhole of 10″ will be made up of 20 stitches (8 stitches + 8 stitches + 4 stitches = 10″ across). 26 stitches – 20 stitches = 6 stitches will not be part of the neckhole. Since we want even sized shoulders, we divide that in half and so we now know our shoulders will each be 3 stitches wide.
Working on the wrong side, mattress stitch the shoulders together. In our example, you would start at the right side and work left 3 stitches. Fasten off. Count 10 stitches over, join yarn, and mattress stitch from right to left the final 3 stitches. Fasten off.
Body
Now, move on to sewing the sides of the body panels together. I like to use stitch markers and pin the sleeves to their correct spots (the armholes). Your sleeves should be the same size as the armhole measurement recommended by the CYC, so, working on the wrong side, mattress stitch from the bottom of the body panel up towards the bottom of the armhole. You can now attach a sleeve by mattress stitching it onto the body panel. Fasten off and repeat on the other side. Weave in all ends!
Cuffs, Waistbands, and Collars
Earlier, we discussed needing to adjust our dimensions if you are adding a cuff. That is the 3″ piece in my sketch below. If you’re adding a 3″ cuff, for example, your sleeve length will be 3″ shorter than what the CYC suggests.
Want to create elastic-style wristbands (or wrist ribbing) like in the photo below?
Attach your yarn to the right side of your sleeve (RS) and work decreases around if you want the wristband to feel tighter than your sleeve. Plan for an even number of stitches around.
Slip stitch to your first chain and work 7 chains. You will now work basic the basic pattern for any single crochet back loop only ribbing. Work all the way around your sleeve until you are at the beginning.
In a pattern, this would be written as:
Work on the RS. Add yarn at the bottom of the wrist so the seam is not noticeable.
Row 1 (RS): Sl st to first st and ch 7.
Row 2: Start in 2nd from hook and work 6 sc down towards wrist, 2 sc along the wrist, turn.
Row 3: Skip 2 sc, 6 sc blo, ch 1, turn.
Row 4: 6 sc blo, 2 sc along the wrist, ch 1, turn.
Rows 5-20 (22): Repeat Row 3 and 4 all the way around the sleeve. You end with making a Row 3.
Crochet last row and Row 1 together with 6 sc in both loops. Fasten off and weave in ends.
Want a waistband in the same style? What about a collar? Repeat these steps for whatever size band you want, adding or subtracting stitches to make it alter the length.
Phew, we made it! I hope there were some ah-ha moments in there. Did anything click that you had been wondering about? Now you can take this foundational knowledge and build upon it in so many ways. Let your creativity flow!
Have a crochet sweater design in your head you’d love to make? Unsure how to get started? I get it – I was also unsure how to take a simple sketch for a crochet sweater and turn it into a reality. It is nearly impossible to find clear instructions on how a crochet top is constructed, what size it should be, and how many stitches and rows you need to make it in that size.
Through research and experimentation, I figured out the key steps to design a crochet sweater. In fact, one of my favorite sweaters I designed was in I Like Crochet. Now, I’m thrilled to share my process with you so you can feel inspired and confident to create your own crochet masterpieces.
For more on my sweater design journey, check out my post below. If you’d like to go straight to my step-by-step guide for designing your own crochet sweater, read it here.
If you’ve ever tried to design your own crochet clothes, you know how hard it is to find clear, step-by-step guidance on the entire process. You might have a brilliant idea for a top but feel lost when it comes to figuring out construction, measurements, or stitch and row counts. There are many amazing sweater patterns for free on blogs and Etsy. But a succinct article on how to make your own? Good luck.
When I wanted to learn how tops are made, I thought I would learn by using already-published patterns and creating a few to see how it’s done. I crocheted several tops from free and purchased patterns and loved how they turned out. It was helpful to see different ways tops are constructed; but in the end, it takes a long time to crochet a sweater and I still didn’t understand how to construct or write a pattern for one of my ideas.
My bubblegum pink crochet sweater. Pattern purchased from Etsy.
Sold on an Instagram ad, I took a Domestika class on crochet garment design. I did not follow the class exactly as it is intended – the instructor wants her students to create a top along with her. Instead, I watched all the videos and took notes. Even though I only followed the course via subtitles, as Laura is Spanish-speaking, I learned so much!
There is one drawback to the class – the supplemental documents the instructor provides and references are not available in English. This is a shame because they sound useful and it seems Laura put a lot of work into them to set students up for success.
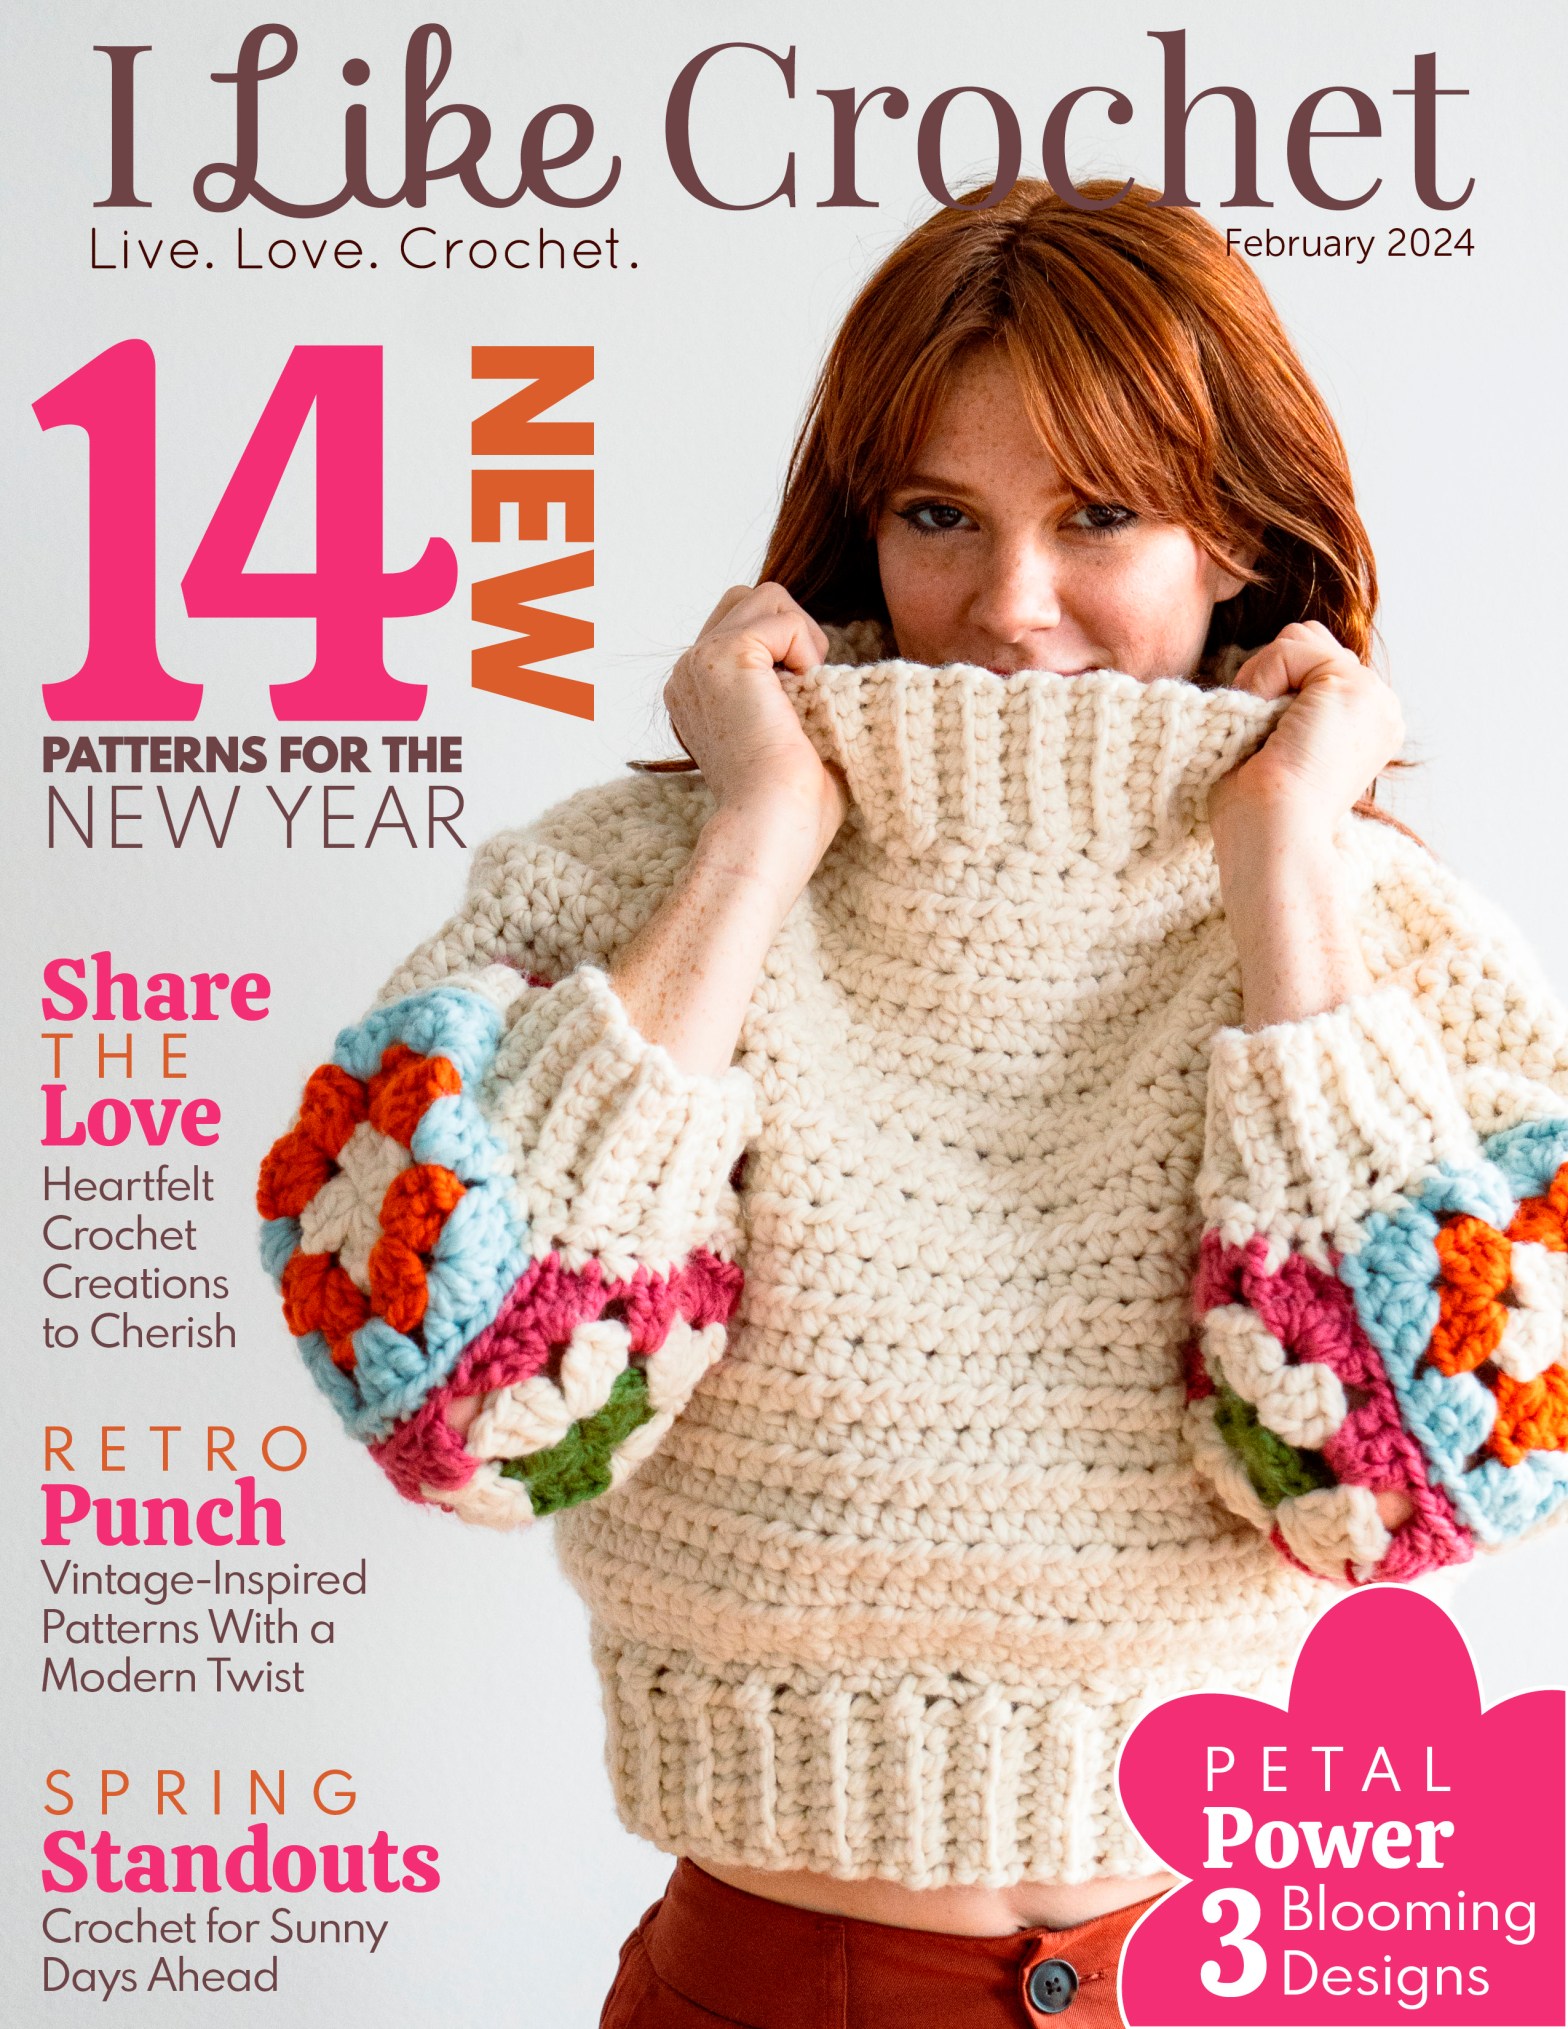
When I saw their call for submissions seeking a sweater design with granny square sleeves, I pictured a mock neck cropped sweater that mimicked a knit in a neutral color. I knew the show stopper had to be the iconic granny square, a humble crochet design that originated in 1891 as a way to use yarn scraps. I love their history and vintage feel, especially when used in a modern application like bright, bold colors and juxtaposed against a neutral base. I Like Crochet was on the same page, so when they chose my design, I got to work making the sweater and writing the pattern.
Deciding on the off-white color for the sweater body was an easy choice, but I debated what weight of yarn to use. I contemplated a worsted weight yarn vs. a thicker, chunkier yarn. A thinner yarn would allow for more drape in the fabric, meaning it would be less stiff than a thicker yarn. The downsides are it would take longer to make the piece (smaller stitches = more stitches need to be made) and the granny squares would look flatter or less dimensional.
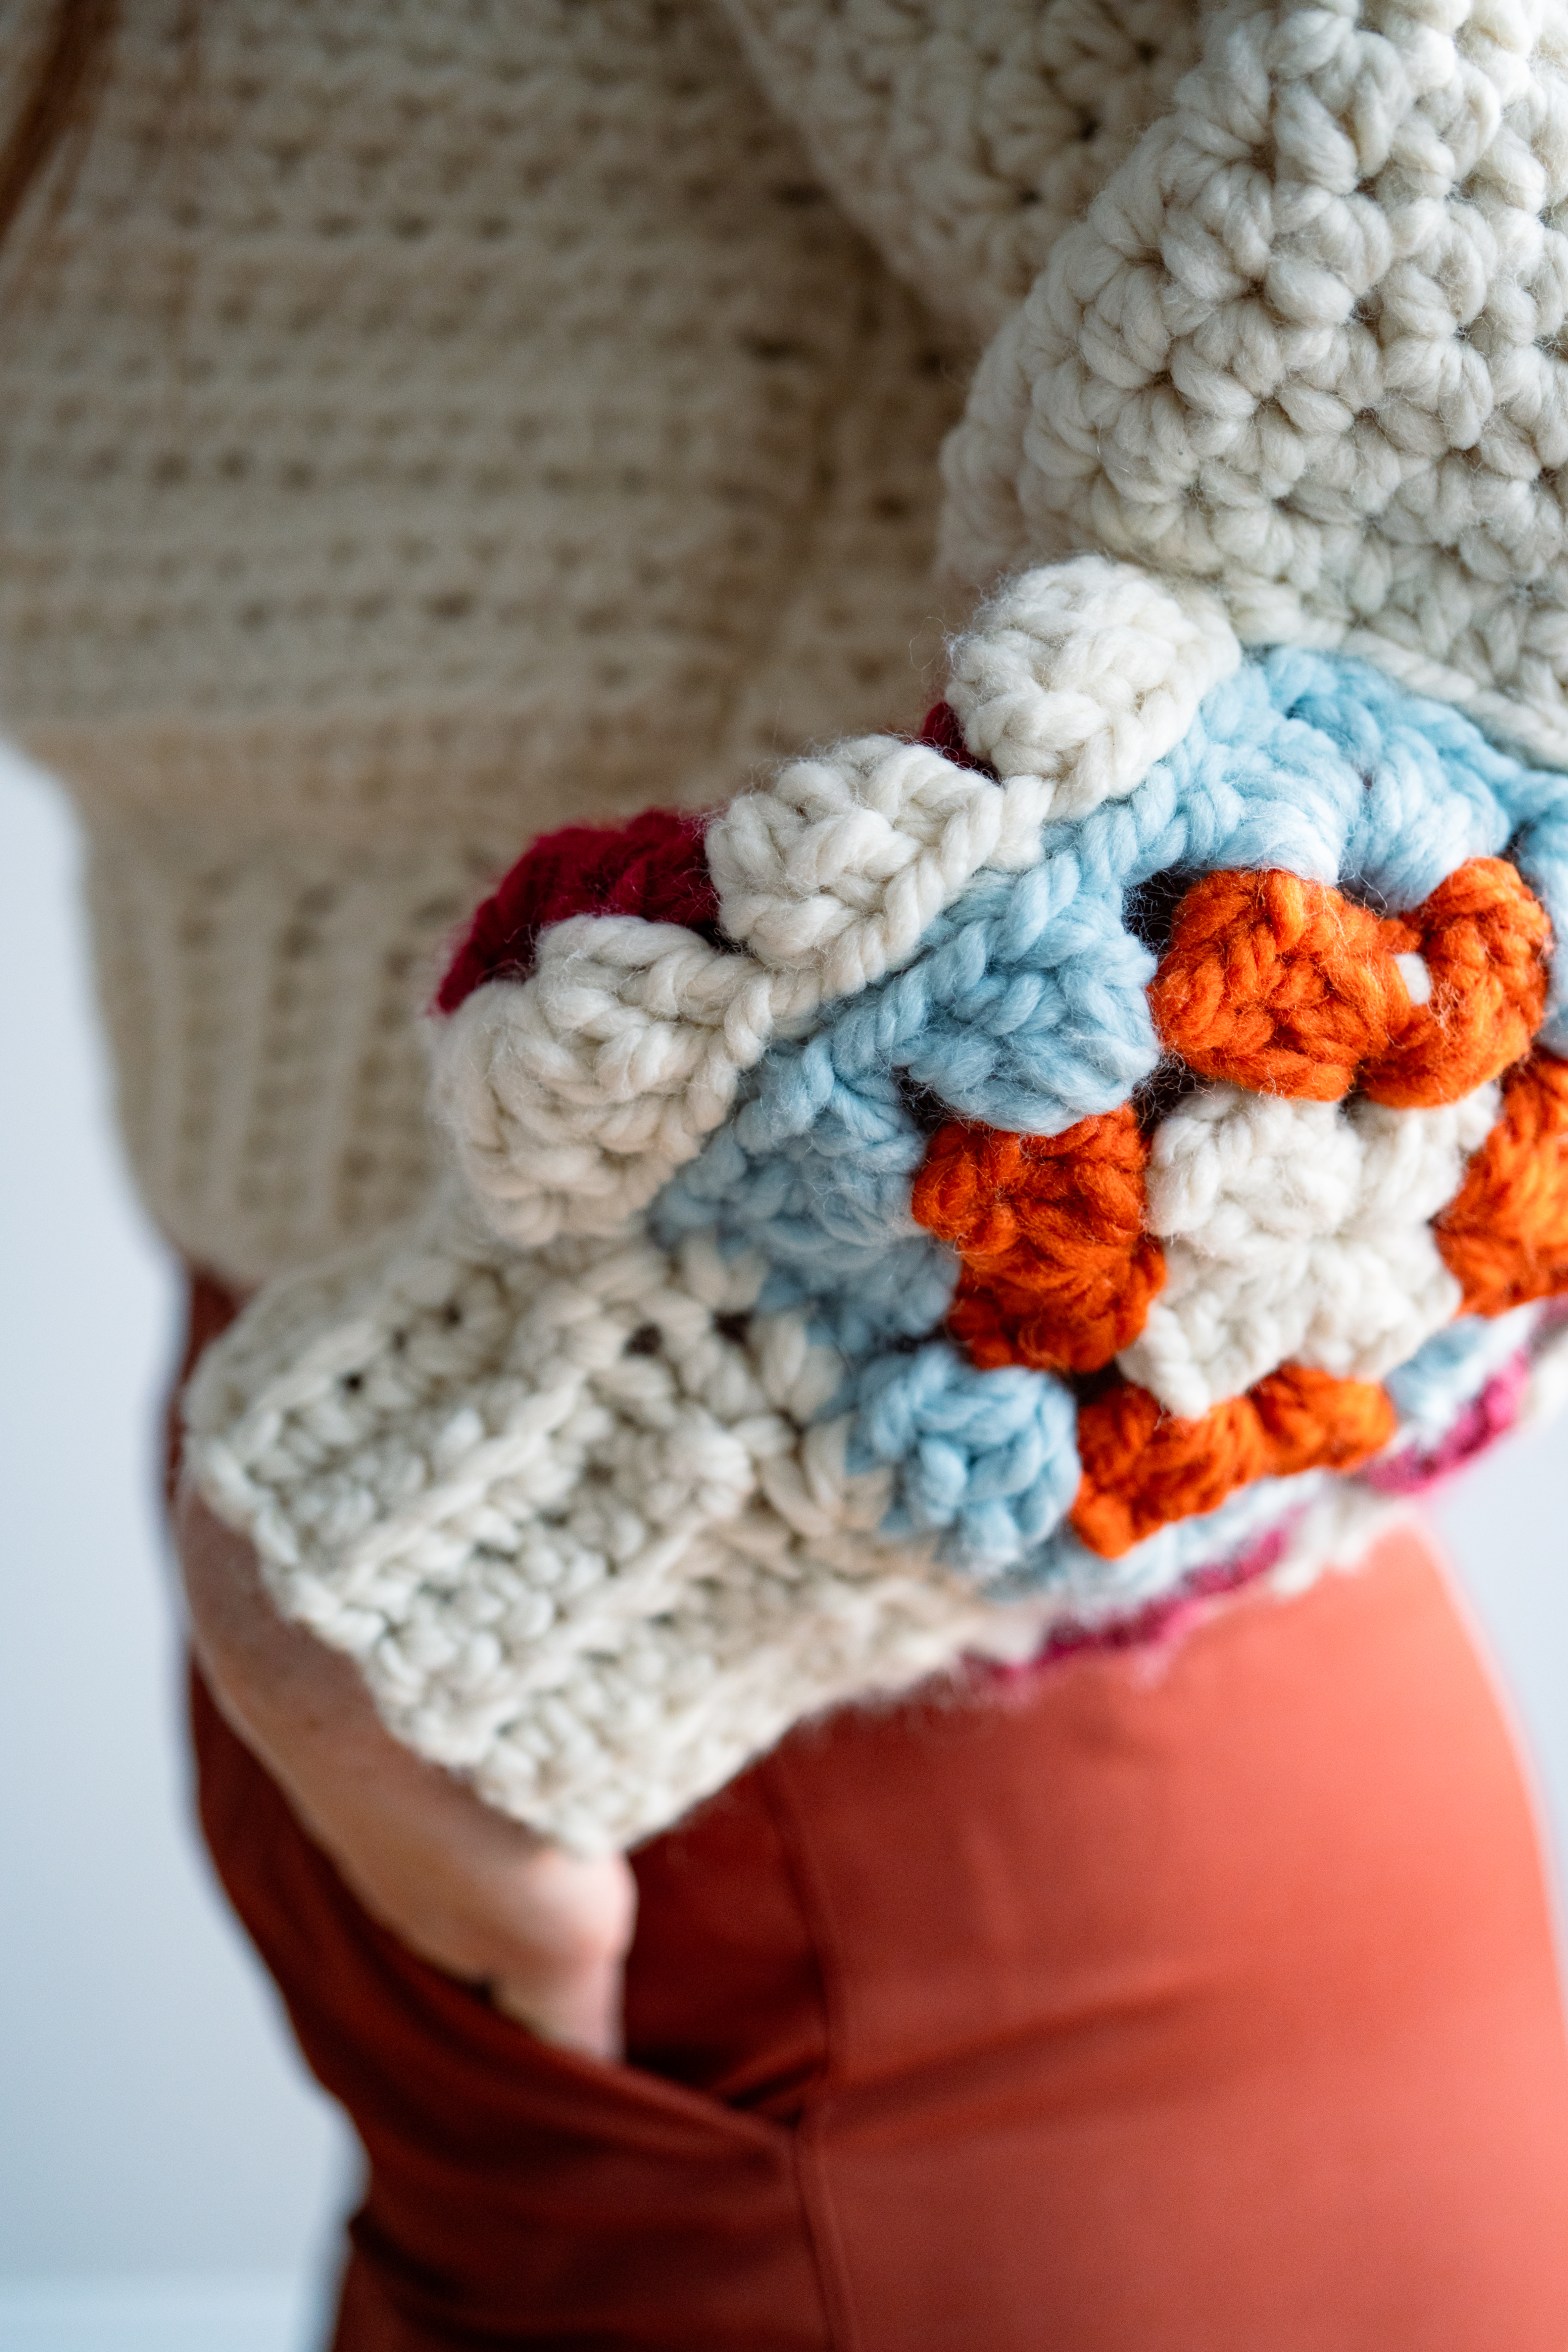
Let me explain that. Chunky yarn makes bigger stitches, which not only helps with project time if you’re like me and like projects that move along quickly, but it also has a different effect on the fullness of the stitch. The bigger stitches look thicker or fuller than with a thinner yarn. With a design like a granny square where you work clusters of stitches into one stitch of the round prior, you get a particularly full and puffy look.
Just look at how bold and puffy the clusters in each square look!
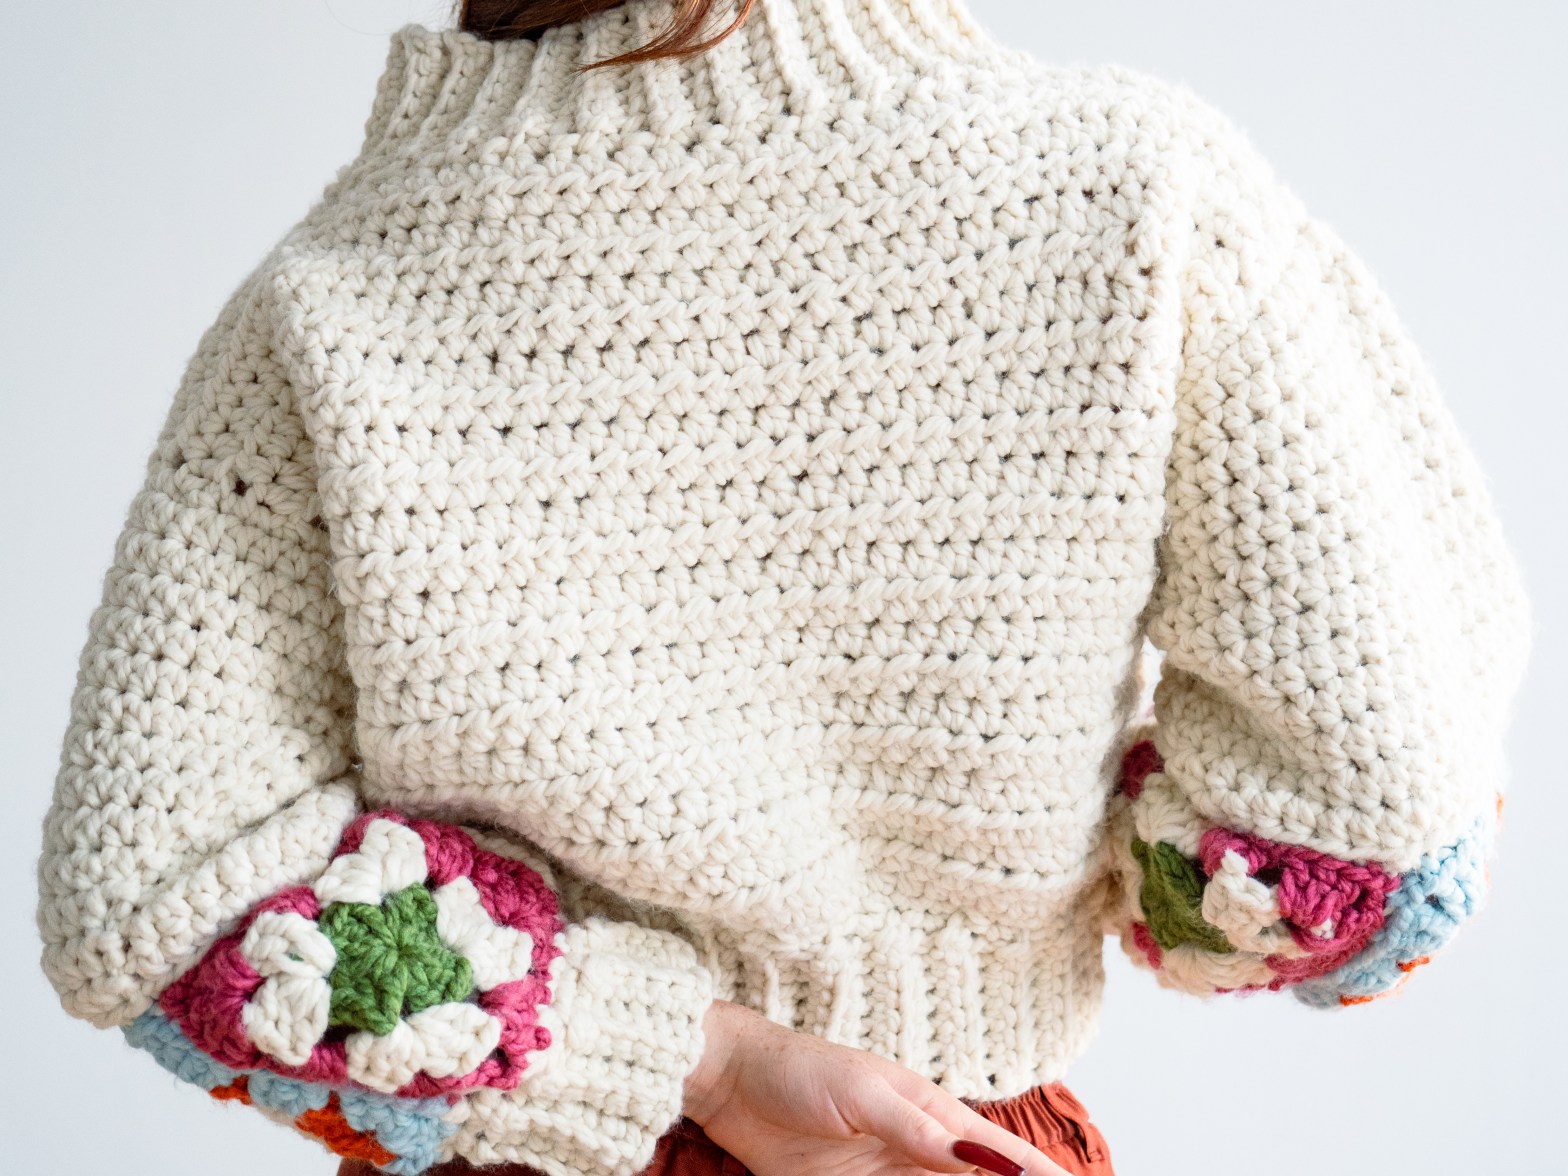
The decision was a no-brainer. The way the chunky yarn makes the puffy squares pop and highlights their texture is so lush. To further reinforce granny squares as the lead character in this story, I worked the billowy sleeves 2/3 of the way down and then wrapped the end in a row of bold granny squares. The bright colors enhance their eye-catching nature, especially in contrast to the neutral off-white of the sweater. I incorporated the same off-white yarn in the squares to have a seamless connection to the sweater itself.
You can see each individual stitch in the sweater due to the pronounced texture – just check out the photo below. I think that’s amazing! I love the boxy body, wide neck band mirrored by the wide waistband, and cropped length. I wore it at Christmas with burnt-orange corduroys before I had even seen this photography, but also love it with denim. It feels both cozy and luxurious.
I was taken by surprise when the issue was released and my sweater was the cover – my first cover design! I hope readers of I Like Crochet try this pattern and love it.
What a fun way to kick off 2024. My swirly socks are featured in the latest issue of Simply Crochet magazine, which is full of fun fractal-inspired designs!
In the Fall, the magazine reached out to see if I would commission a pair of socks inspired by the image below. This felt like a creativity challenge for me since I had never created anything inspired by such a bold pattern. Challenges are how you grow, so I happily agreed and got to work on design ideas.
The yarn they recommended is Scheepjes Metropolis in the same gorgeous colors as the swirl image (seriously, check out the video below to see how dreamy they look), but we encountered some issues with shipping. Fortunately, a local yarn shop in Ohio, Around the Table Yarns, had all the yarn and were wonderful to work with. It arrived quickly, and my first impression was how soft and durable they skeins felt due to the blend of wool and nylon.
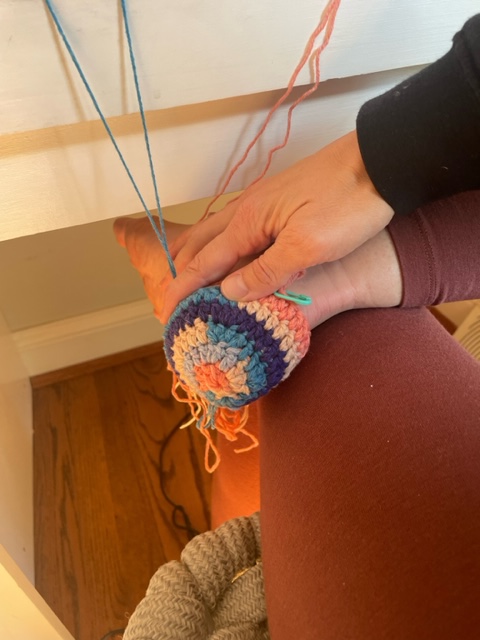
To mimic the movement in the inspiration photo, I gave the socks a unique swirl heel and toe. You can’t see these elements with shoes on, so it creates a fun peek-a-boo effect, or a “secret detail” as the magazine refers to it.
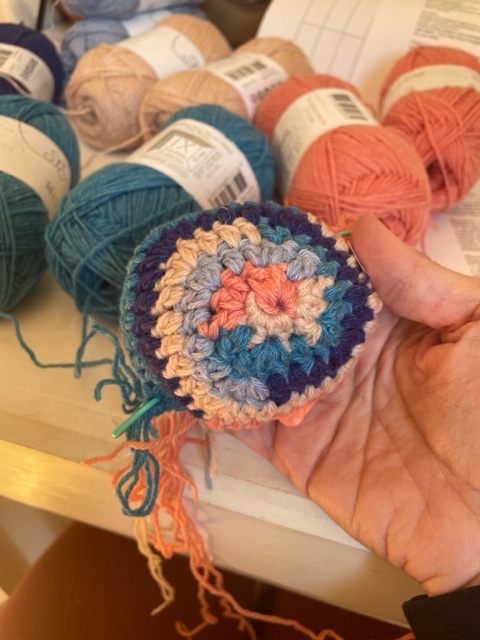
Not everything works out the first time, and that was the case with my heel. I initially used more colors to create a gradient effect like the inspiration photo. The end result was not what I was going for, as you can see below. So why am I showing you this? I suppose so you can see it’s not always a straight forward process, everyone makes mistakes along the way, and it’s ok to go back to the drawing board.
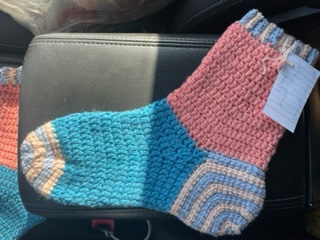
Once I felt good about using only two colors, which has the benefit of a more straight forward and user-friendly pattern, I reinforced the fractal look with a third hit of the two colors in the cuff. The striped cuff also lends to the fun secrecy of the socks. Here is the pic I took in the post office parking lot before I shipped them off to the UK.
I kept the foot and leg portions of the sock simple intentionally. Using blocks of color keeps the focus on the swirl and striped details, feels reminiscent of the inspiration photo, and creates a solid fabric so they are wearable and not too busy. I doubled the yarn, meaning I worked with two strands at once, to create a thick and comfortable feel.
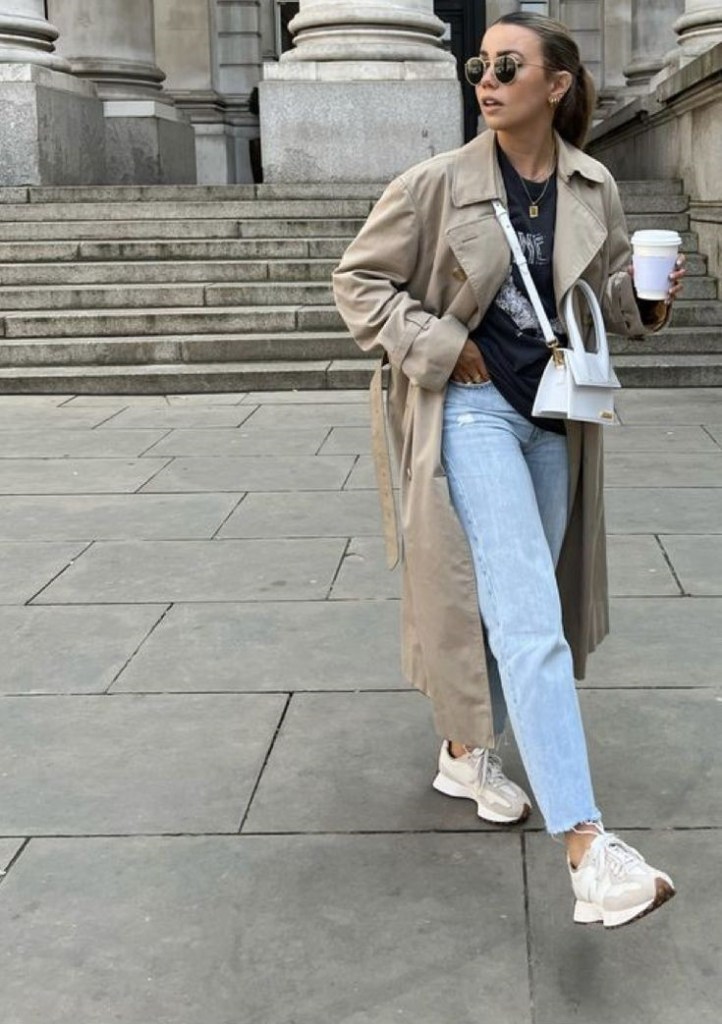
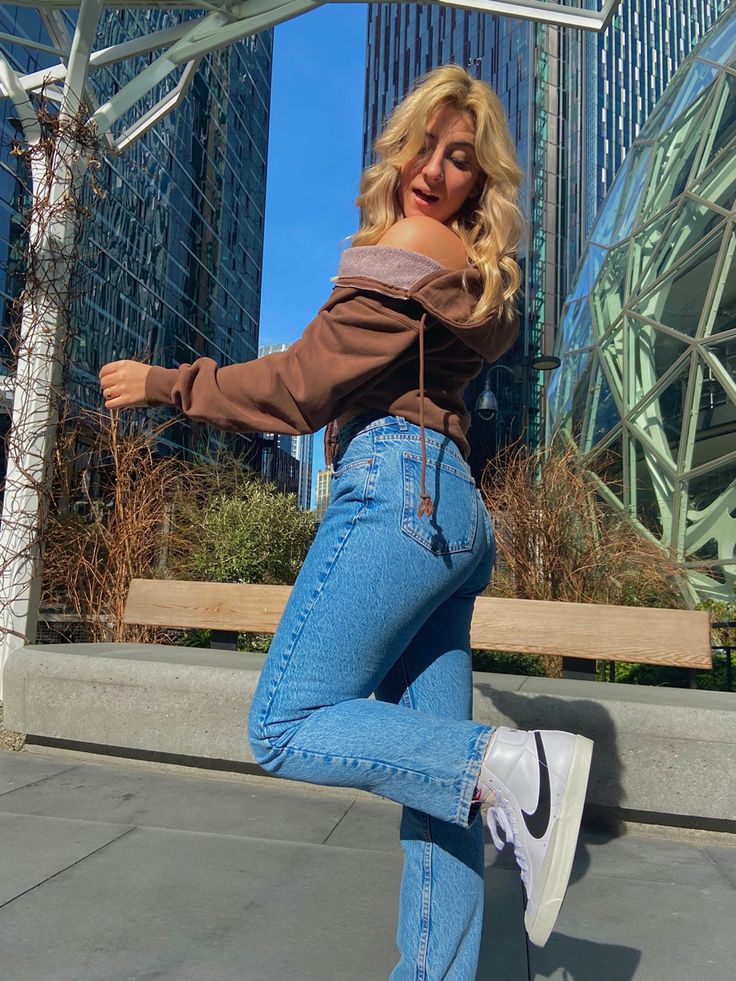
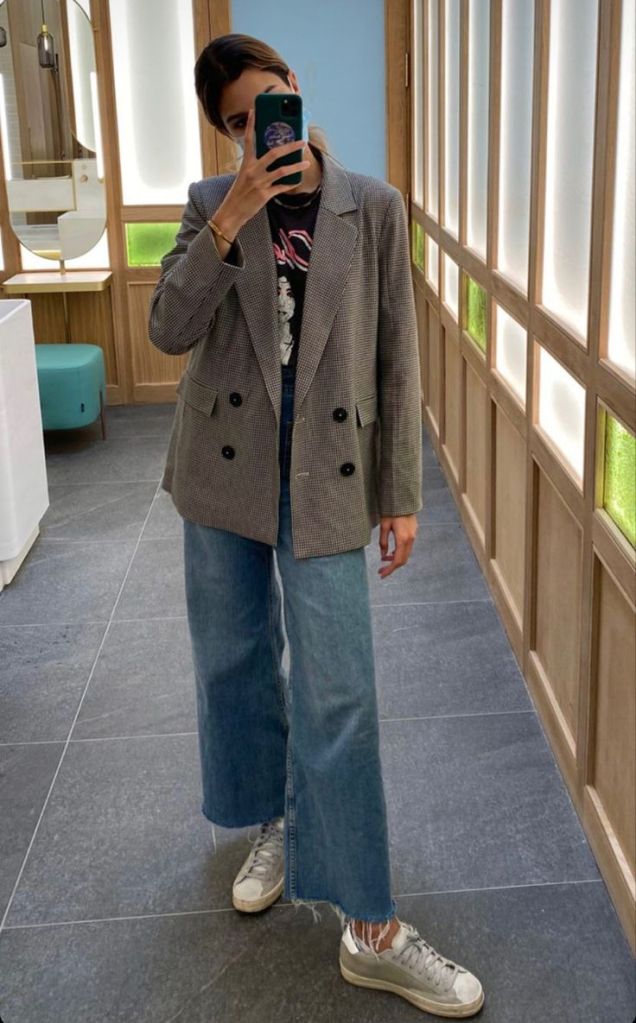
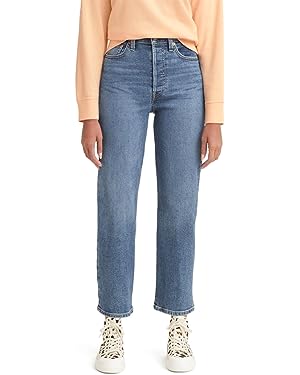
While I love the peek-a-boo aspect, I also love a little sneak peek. I can’t wait to wear them with slightly cropped jeans like these Levi’s I own and Nike Blazers so they pop out at the top when I sit down and walk. I can picture them in different color variations and with a variety of looks, like an off-white or oatmeal and charcoal combination.
Can you picture them with neutrals?Or fun pops of color?
Let me know what you think of my most outside-the-box project. If nothing else, I hope you are inspired to inject some fun into your wardrobe. The entire issue is full of creative projects, as most issues of Simply Crochet are! I always enjoy collaborating with them, and I am especially grateful this time around for pushing me outside my comfort zone. As I say in the issue, “The beauty of crochet is its inspiration of creativity and the magic of making.”
December is flying by at lightning speed. I feel it, so others must too. If you’re looking for quick crochet projects that can be made with minimal time, yarn, and effort, I’ve compiled the perfect list for you. They make great gifts for family, friends, teachers, neighbors, and so on. Beginners can accomplish any of these patterns with patience, and intermediate and advanced crocheters will whip them up in no time.
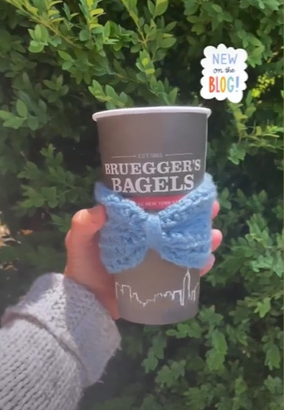
1. Bow Coffee Sleeve: This is a SUPER fast project and is very beginner-friendly! Slide it on an empty Starbucks cup (or your favorite local coffee shop) with a gift card inside!
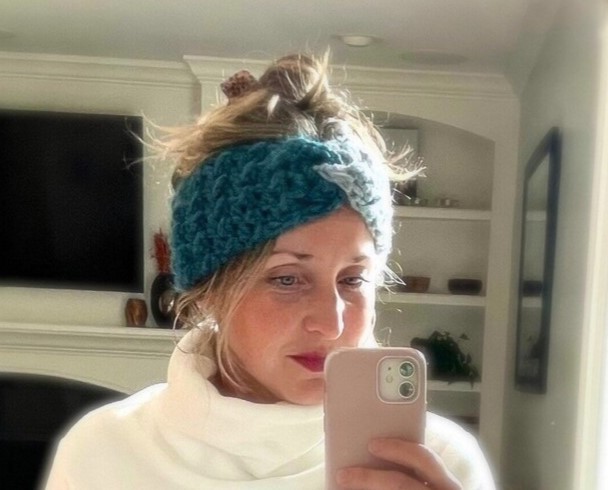
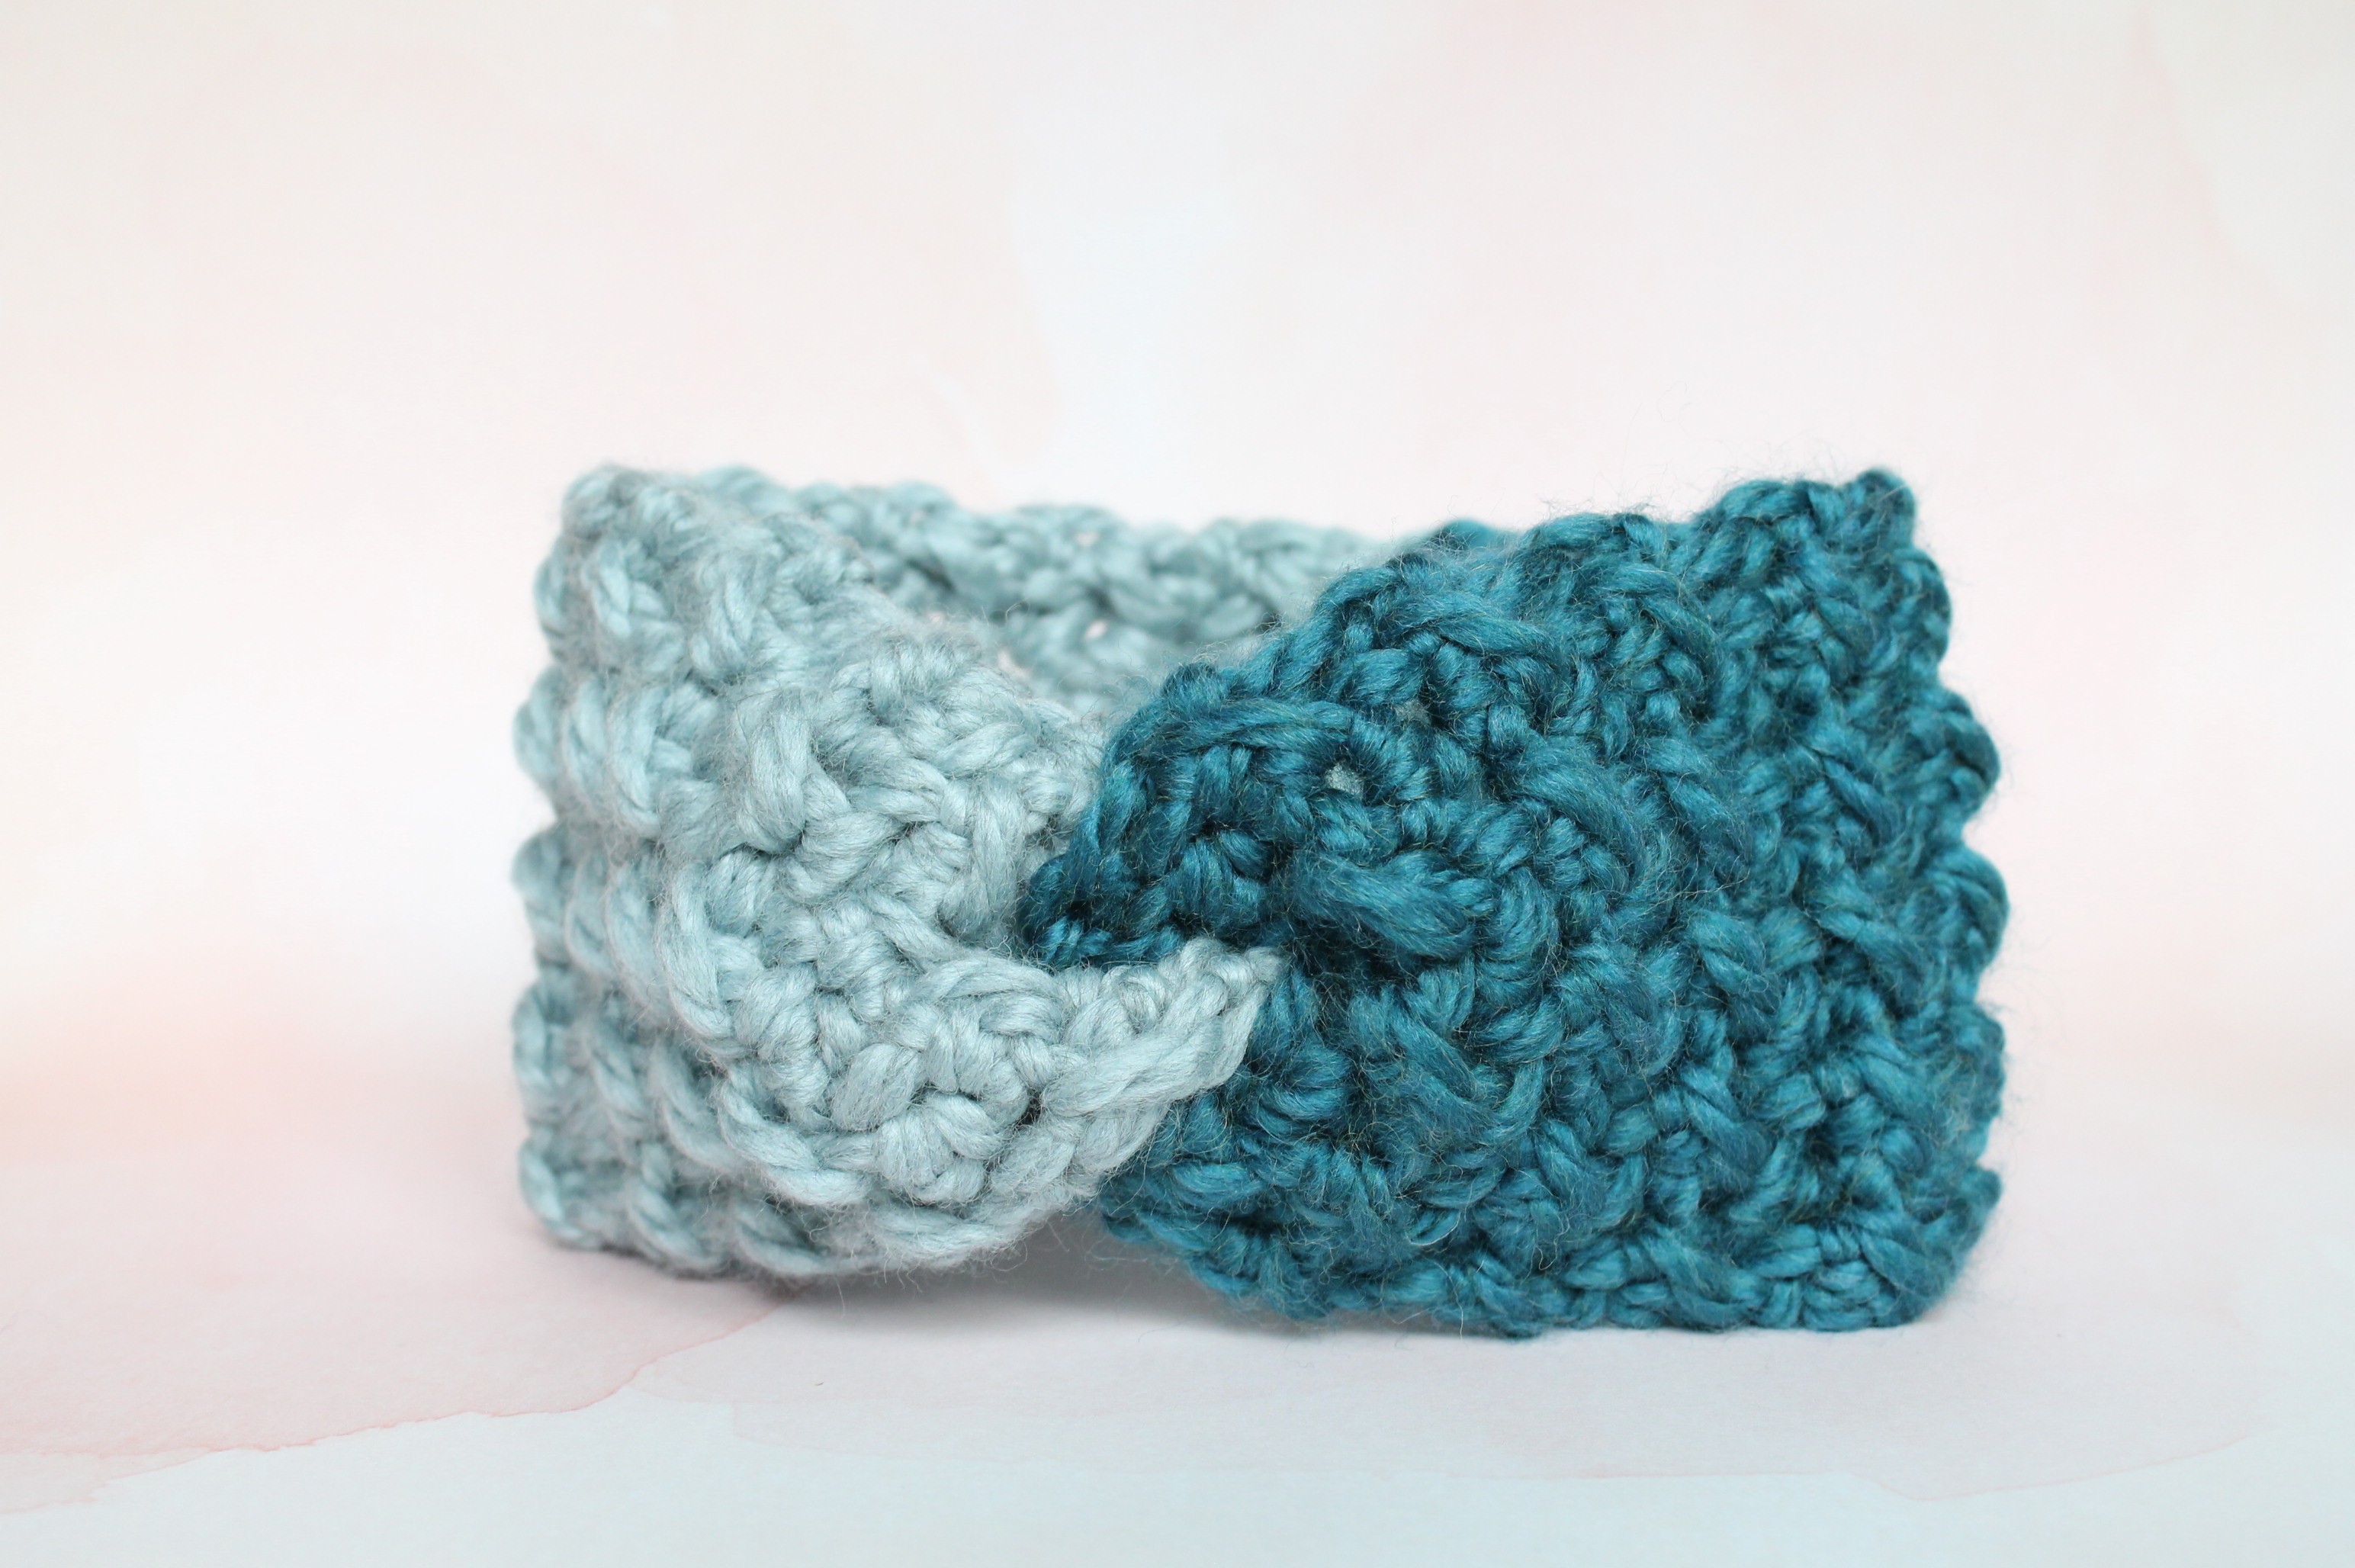
2. Chunky Twisted Headband Earwarmer: I love this for its pronounced texture (how cool is the even moss stitch?), eye-catching color combination possibilities, and ability to be worn in the cold without taking your hair out of its ponytail or hair clip.
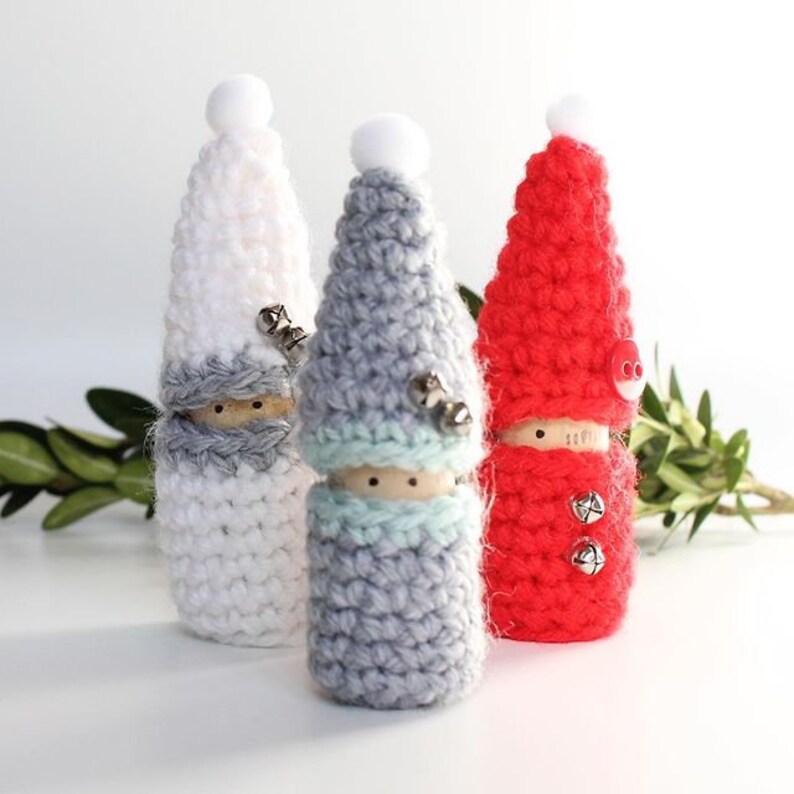
3. Mini Cork Elf: Clear out some of your yarn stash, grab an old wine cork, and fire up the glue gun to make these winter cuties. They work up quickly and would look so cute tied onto a present, strung together as a winter garland, or packaged as a gift set. Read more about them here.
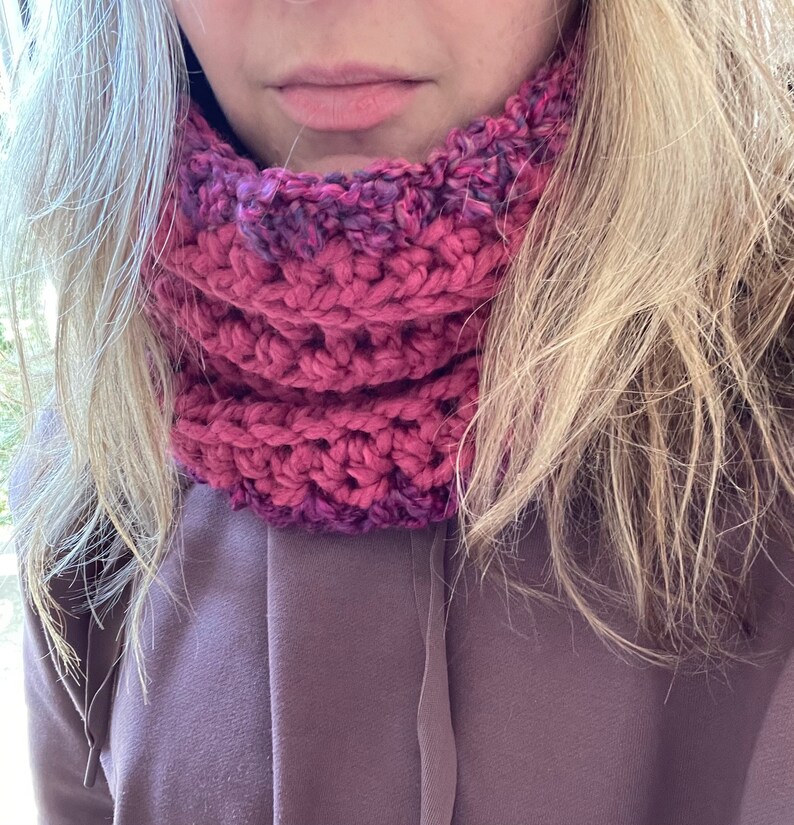
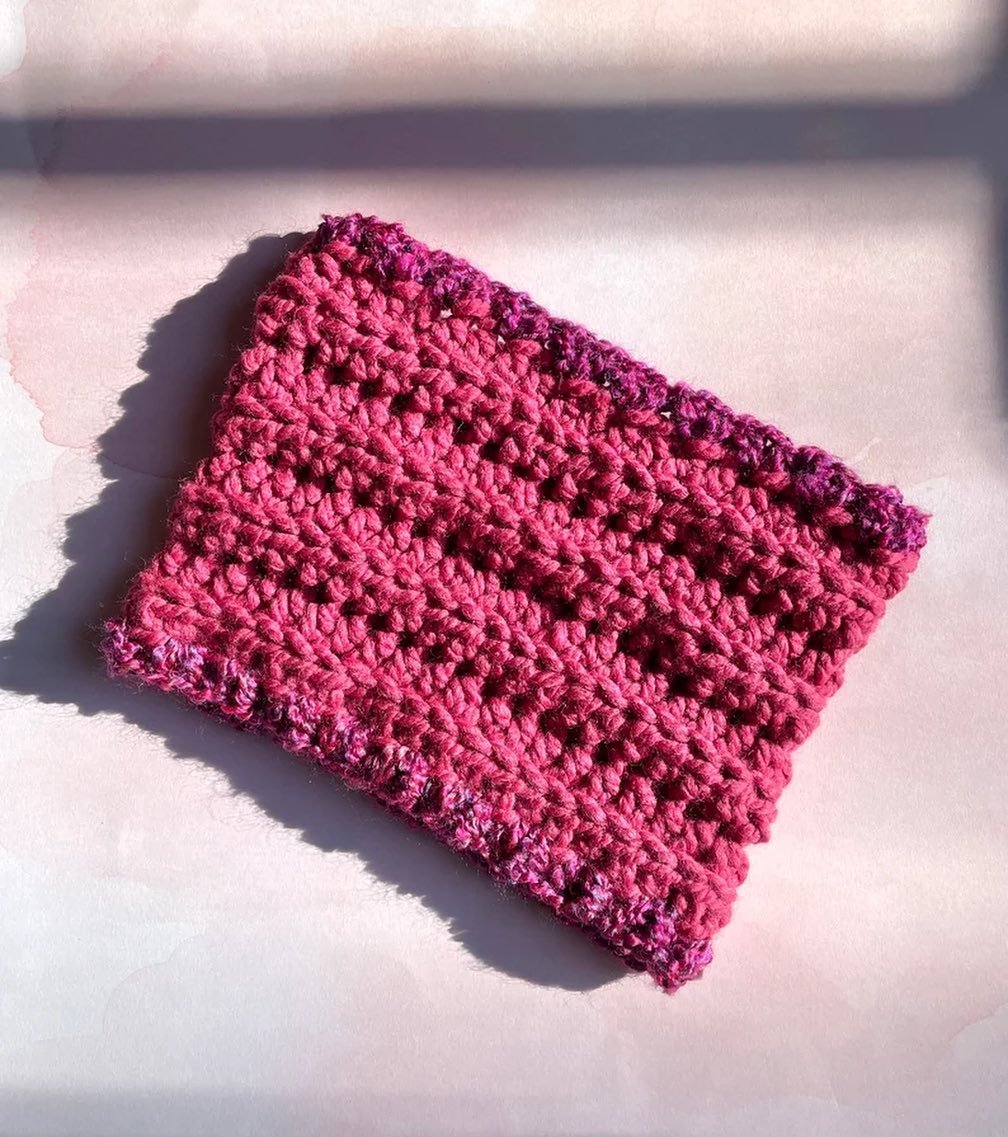
4. Chunky Cowl Scarf: This scarf is so comfortable to wear. It gives that full look and keeps you warm without being bulky. It’s quick to make and the textured trim gives a pop of color and softness.
5. Striped Chunky Beanie: This is my most popular item! People love to wear it and make it. I know I do! Swap out the colors to tailor it to your recipient’s preferences and it changes the whole look. I also love it in a solid like Lion Brand’s Fisherman with a multicolor pompom. You’ll never want to use a different hat pattern again!
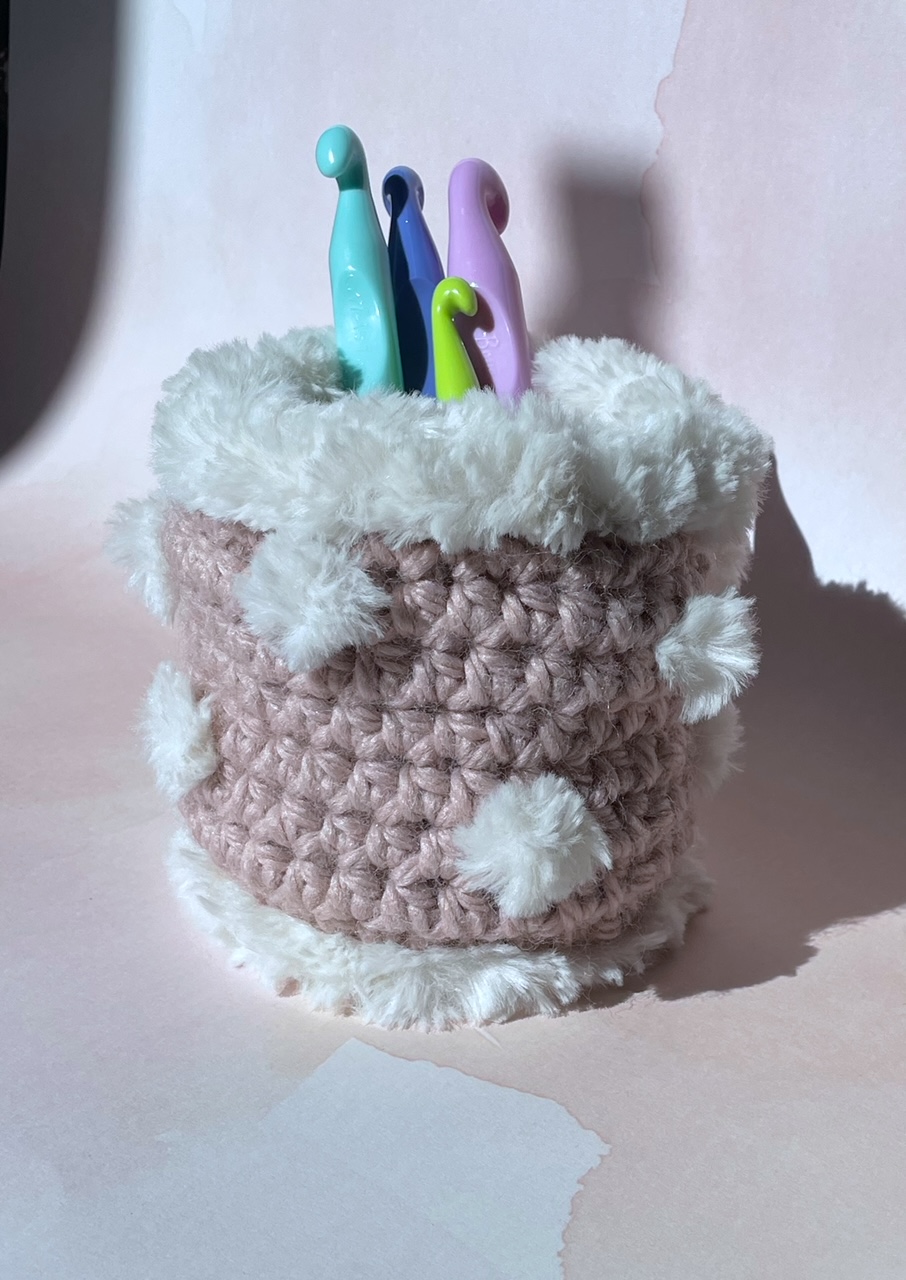
6. Boho Pom Pom Basket: If this basket was a person, she’d be loads of fun with a touch of glam. I could see it holding a variety of items on someone’s desk, crafting table, dresser, or vanity. You’ll be surprised to learn how the pom poms are created!
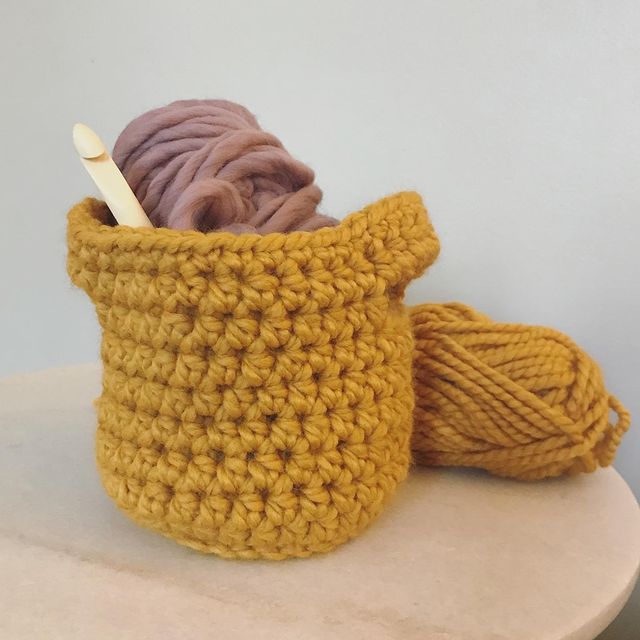
8. Hanging Basket: Hot tip: Use one strand of Lion Brand Wool-Ease Thick and Quick and a K hook instead of two strands of worsted weight yarn. No tangles as you work, lots of color options available, great texture.
Do you have a stash of old wine corks you’ve saved “just in case?” How about a collection of yarn scraps, because, “you never know”? Good news – I have the perfect winter project to use them up and create timely holiday gifts or festive winter decor.
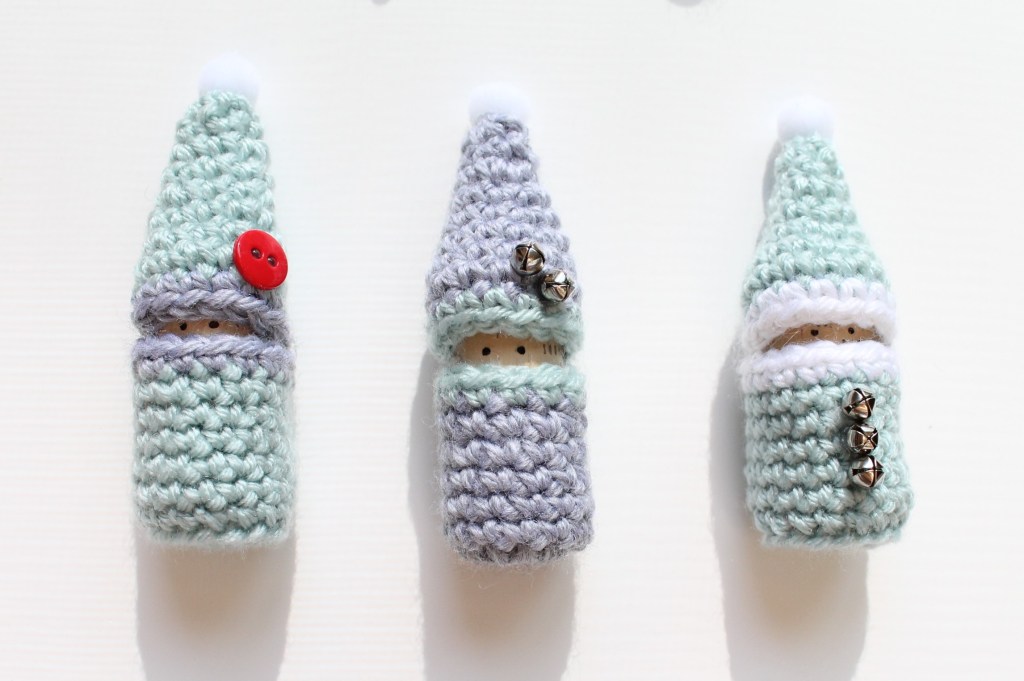
At just 4″, my Mini Winter Elves use a wine cork for the body, about 5 yards of yarn for the sweater and trim, and about 8 yards for the hat and trim. They look adorable in winter colors like grey and white, Christmas colors of red and green, or any fun combinations of your choosing. For example, I depleted a small stash of mint yarn I had on hand, and combined it with grey and white to look modern and wintery. See some of my color ideas here.
Simple crafts supplies can be used for embellishments, like small buttons and bells for their sweaters, and a tiny pom pom for their hat. See what you have on hand before you run out. You can draw on a face, just eyes, or my favorite, eyes and a little nose, and the result is undeniably adorable.
If you’re familiar with amigurumi, you are comfortable working in the round on a small scale and assembling the parts to create your little elf. If the term is new to you, amigurumi is a form of Japanese crocheting or knitting small objects out of yarn. It is typically done in the round and uses stuffing to create the 3D form. For this project, we are using up the old wine corks you’ve been holding onto instead of stuffing. Or in my case, a giant bag of old corks my sister-in-law gave me! If you’re making a collection of elves and the corks are different sizes, that just gives them personality.
Gives this quick project a try if you’re looking for a unique gift this winter or a cute addition to your house. They’re a fun little surprise to send someone in the mail and are easy to ship due to their small size and light weight. They look adorable as a tiny army of Santa’s helpers on your shelf, or strung together as garland. They can be packaged up in creative ways and sold at markets. My daughter even used them for a sweet teacher gift as the main characters in a homemade gingerbread house vignette!
Here are a few color and style combinations I made. The options are endless; I can’t wait to see what you make! Be sure to share on Instagram and tag @nickibyrnescrochet!